
Painting the Skin - Complexion - Tonality and Color Temperature
Part 1: Painting the Skin with Beauty and Elan).
Part 2: find it down the scroll. This chapter could be useful when painting the beautiful skin of Caucasian people, or so-called white complexion.
Part 2: find it down the scroll. This chapter could be useful when painting the beautiful skin of Caucasian people, or so-called white complexion.
If you prefer to paint darker, or olive-skinned complexion, such as the Mediterranean people, Semitic or African lovely complexions such as those of the Ethiopians and Nubians, there is always merit in an artist that does not suffer his subjects to be painted with monochrome colorations devoid of complementary wholeness, grace and naturalism.
Painting the Skin with Naturalism:
Quite often I have come across paintings of white complexion with a sickly sallow tinge, or black people painted in a most unnatural fashion, as though they have been daubed with coal or some black-pitch pigmentation.
The truth is that dark-complexion would look gorgeous if mixed with a richly-colored concoction of browns, reds and dark hues toning down the skin in a most salubrious fashion.
A dark-skin would look healthier if there is a hint of underlying reddish elements, such as meandering arteries, living organs and vessels filled with wine-like tonality (such as found among famous celebrities) which could perk up the person’s appearance with life-enlivened vitality, beauty and otherworldly tropical exoticism.
Of course I have painted people with darker complexion (so called brown skins) and the concoction would be the more natural if there is a gentle interplay of cool (greens) versus browning hues such as sepias, earth colors, burn umbers and so on).
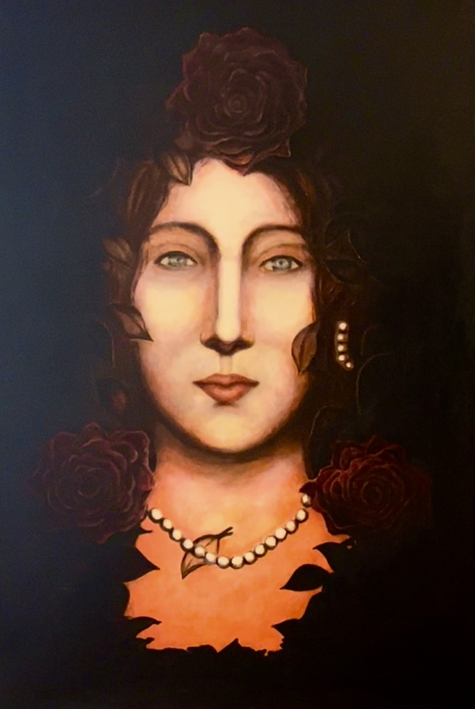
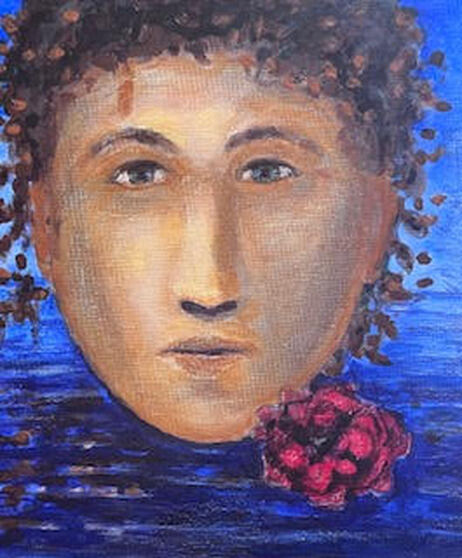
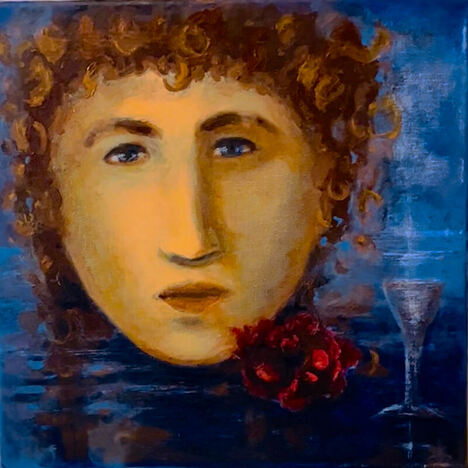
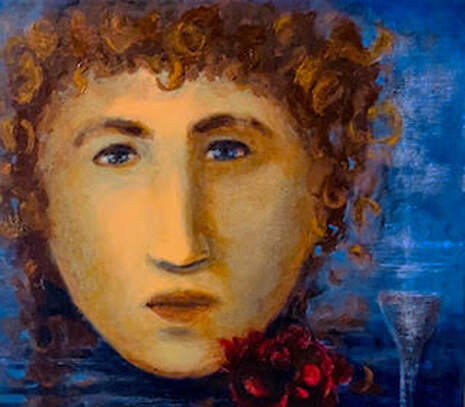
Ave Maria by Eddie Beato
Painting the Skin with Naturalism:
Quite often I have come across paintings of white complexion with a sickly sallow tinge, or black people painted in a most unnatural fashion, as though they have been daubed with coal or some black-pitch pigmentation.
The truth is that dark-complexion would look gorgeous if mixed with a richly-colored concoction of browns, reds and dark hues toning down the skin in a most salubrious fashion.
A dark-skin would look healthier if there is a hint of underlying reddish elements, such as meandering arteries, living organs and vessels filled with wine-like tonality (such as found among famous celebrities) which could perk up the person’s appearance with life-enlivened vitality, beauty and otherworldly tropical exoticism.
Of course I have painted people with darker complexion (so called brown skins) and the concoction would be the more natural if there is a gentle interplay of cool (greens) versus browning hues such as sepias, earth colors, burn umbers and so on).
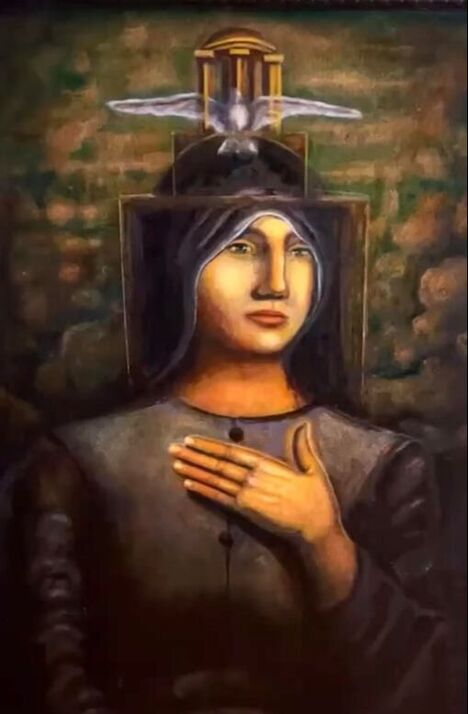
Ave Maria by Eddie Beato
Getting a cool realistic touch could be indistinguishable from magic, and it is due to “color temperature,” which is comparable to “saturation” in your phone-application.
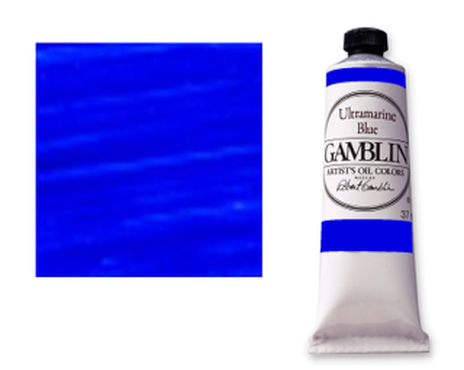
The illusion of underlying arteries is due to the cool bluish hue (ultramarine blue) as the “imprimatura,” or underpainting.
For white skin, Spanish painter Diego Velazquez, like artist American, Sergeant, would use Venetian Red mixed (or whitened out) with Titanium White and Yellow Ochre, and probably an addition of Cadmium Red, but such scheme of colors, as they are opaque, and therefore sealing the canvas’ pores, “the uplifting phenomenon of light” would not bounce-off, thus impeding a luminous surface-finish.
For this reason, and following on the footsteps of Salvador Dali, and Maxfield Parrish, I would use as little pigment as possible, because transparency, like a stain-glass window, is the magic behind some of the most beautiful paintings by the Pre-Raphaelites!
Positive Space (body of Christ) Vs Negative Space (darkness)
Corpus Hypercubus by Salvador Dali:
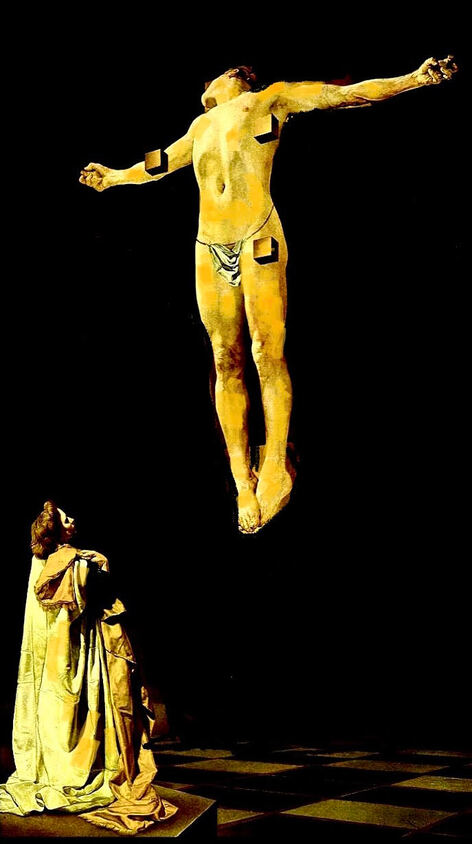
First and foremost, you ought to understand what is a “positive space” vs “negative space.”
For the most part, positive space would come to the fore —-forward to the viewer—- while the negative space would recede. The positive space is the least pigmented, and hence, it seems to pop out of the canvas (Take a look at the painting above, Corpus Hypercubus by Salvador Dali).
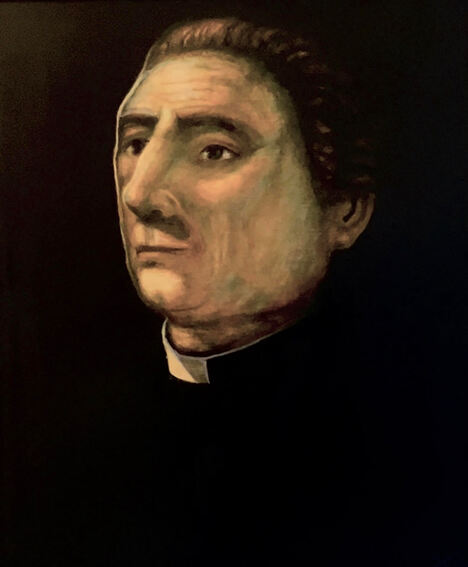
Portrait of a Priest, Oil On Canvas, by Eddie Beato
For the most part, positive space would come to the fore —-forward to the viewer—- while the negative space would recede. The positive space is the least pigmented, and hence, it seems to pop out of the canvas (Take a look at the painting above, Corpus Hypercubus by Salvador Dali).
Portrait of a Priest, Oil On Canvas, by Eddie Beato
PART 2: Painting the Face of Tadzio (from Death in Venice by Thomas Mann)
Painting is a repetitive process. Therefore, every phase was a repetition of the same process. Pre-Raphaelite technique would require multiple glazes, “scumblings” and the patience of an artist.
Painting is a repetitive process. Therefore, every phase was a repetition of the same process. Pre-Raphaelite technique would require multiple glazes, “scumblings” and the patience of an artist.
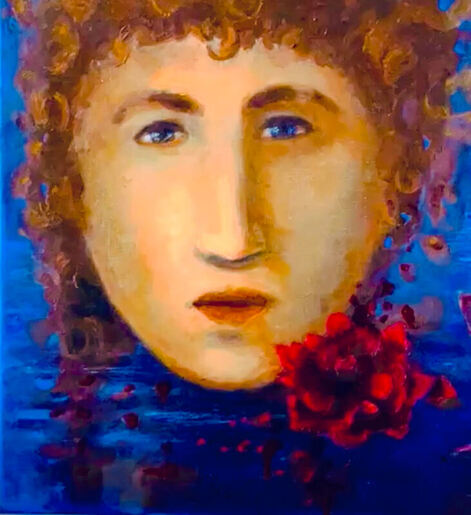
For fresh skin-tones, I used the same technique as Raphael: an “underlying imprimatura” or >grisaille< of cool vs warm tones, and then would apply the skin (upper layer) *scumbling with (yellow ochre plus a tad of titanium white).
At the very end, I only scumbled with titanium white plus a tiny tint of yellow ochre.
Final touches (rouge) would consist in applying small tints of warms (saturation, with brown ochre) allowing the underlying cool tones (the imprimatura of ultramarine blue) for subtle nuances and “color temperatures.”
Once again, unlike Raphael, I used Ultramarine Blue for the “Imprimatura” or grisaille.
The old masters tended to mix white + black to modeling the figure in shades of gray, but such grisaille would not be as effective for a luminous, transparent finish, such as the dazzling religious paintings of Salvador Dali.
My Color Scheme is rather small, but I can paint almost anything with this humble palette:
1-* Ultramarine Blue (underpainting)
2-* Alizarin Crimson
3-* Purple (Ultramarine Blue and Alizarin Crimson)
4-* Burn Umber
5-* Yellow Ochre (+ titanium white for highlights)
6-* Cadmium Yellow
7-* Titanium and Flake White White (+ yellow ochre for highlights).
8-* Emerald Green
9-* Phthalo Green
10-* Olive Green
PART 1
Imprimatura: Drawing with Ultramarine Blue!
If you paint everything with ultramarine blue, things would appear as though cast in a bluish, aerial illusion of depth and atmosphere, especially the background (ether) could tint the hazy distance with a blissful illusion of expansiveness.
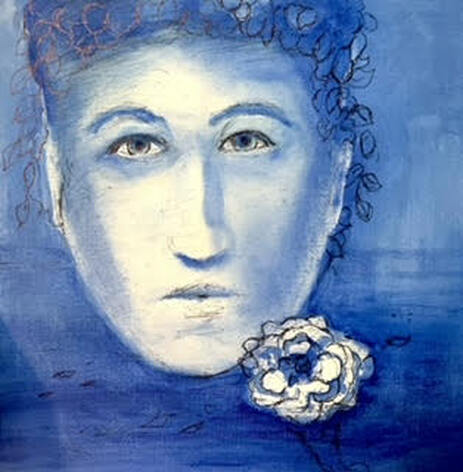
Drawing should be transferred unto the canvas. This is an underpainting done with “Ultramarine Blue.”
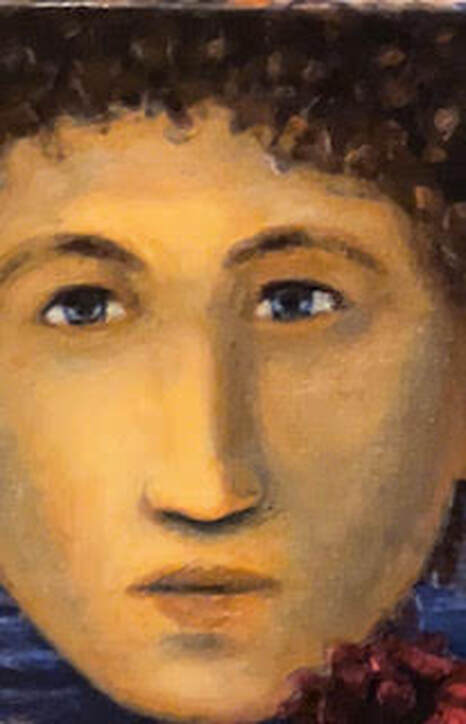
2-* Once you are satisfied with your monochrome ultramarine underpainting, start to warm up the face with lovely washes of Brown Ochre and Yellow Ochre + Titanium White (for the lightest) highlight on the right side of the face.
The highlight, which is mixture of titanium white + yellow ochre (and a tinge of cadmium yellow) should be applied transparently (glazing) multiple times till you are satisfied!
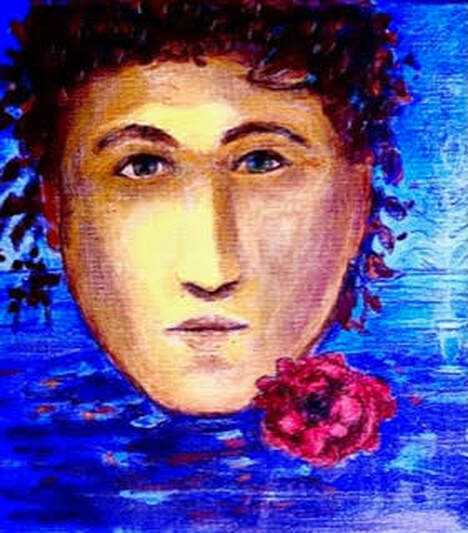
3-* At this point, apply a coat (…) of your skin-concoction with a mixture of your “color-scheme” for your picture: ideally would be the three main warm colors (key-colors): Brown Ochre, Yellow Ochre, and a small amount of Alizarin Crimson.
Once it is dried, scrape off any excess of paints blocking the light from going through the canvas’ pores (remember to keep the first layers very thin and smooth).
Once it is dried, scrape off any excess of paints blocking the light from going through the canvas’ pores (remember to keep the first layers very thin and smooth).
4-* Step: Work on the skin-tones (warms vs cools) by applying (scumbling) Yellow-Ochre + Titanium white on the entire face.
Allow the warm tints (here and there) to show through.
Allow the warm tints (here and there) to show through.
5-* The same process was applied till I was satisfied with the effects:
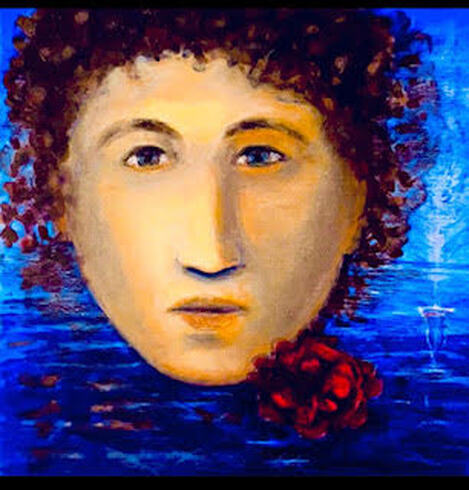
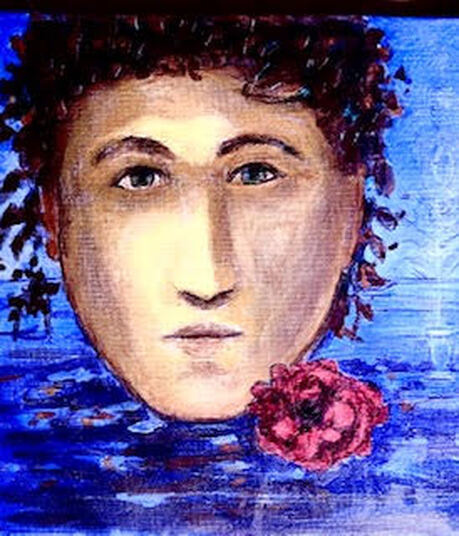
Step Six: Continue working on the hair (ringlets). The darkest ringlets were painted with transparent glazes of Burn Umber!
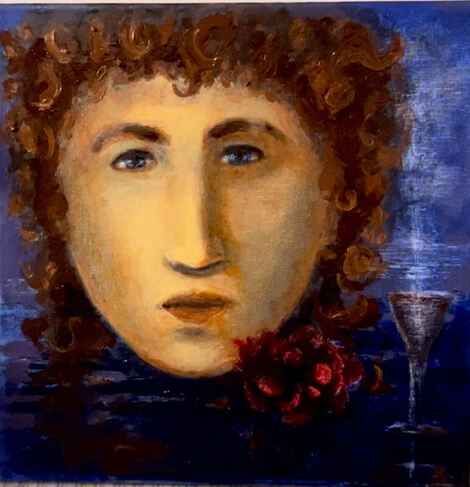
For the highlights of the ringlets, I used Yellow Ochre plus Brown Ochre.
Bluish Background was retouched with transparent Ultramarine Blue mixed with Alizarin Crimson + Titanium White.
I wiped out any excess blocking the underlying bluish imprimatura.
Bluish Background was retouched with transparent Ultramarine Blue mixed with Alizarin Crimson + Titanium White.
I wiped out any excess blocking the underlying bluish imprimatura.
Painting Beautiful Stones Structure with Neutral Shades and the Gorgeous Patina of Time!
In the months to come, I will be painting a throw-back return to Ancient Greece. As I have shared my painting-secrets with some friends via e-mails, I could now easily retrieve these notes, and carefully guide-myself-through-and-through according to previous errors and trials, and hence, enjoy the prospects of some blissful months in the high expectations of the Spring Season: the good fruits and blooming flowers of our hard-won experiences!
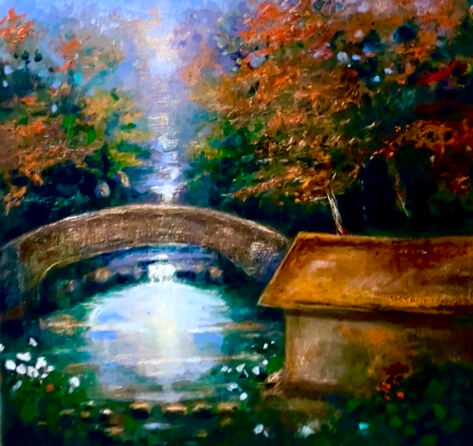
This painting, Autumnal Cabin, is a fine study (Etude) on landscape:
Autumnal Cabin by Eddie Beato
This painting, Autumnal Cabin, is a fine study (Etude) on landscape:
Autumnal Cabin by Eddie Beato
Unraveling the Secrets with Sophia!
Step One:
Block-in with Brown Ochre (like water colors-application) over and over till you are pleased.
Block-in with Brown Ochre (like water colors-application) over and over till you are pleased.

Step 2:
You could even warm it up to a fiery surface as though basking in a sunshine of happiness.
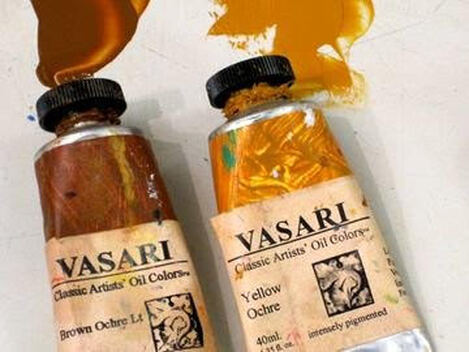
Here and there, you may add color temperature between Brown Ochre Light + Yellow Ochre Light! Wow! Very nice!!!
Color-Temperure (very Important)
You could even warm it up to a fiery surface as though basking in a sunshine of happiness.
Here and there, you may add color temperature between Brown Ochre Light + Yellow Ochre Light! Wow! Very nice!!!
Color-Temperure (very Important)
Step 3
Shadow Accent with a Mixture of Brown Ochre & Burn Umber.
Shadow Accent with a Mixture of Brown Ochre & Burn Umber.
Shadow 4:
Stronger Accent-Shadows at the base:
Stronger Accent-Shadows at the base:
Step 5:
Neutralizing the Imprimatura of the Earth-Colors, Brown Ochre, Burn Umber:
Apply a coat of Mat Varnish to seal the surface from mudding with upperlayerd pigments.
Neutralizing the Imprimatura of the Earth-Colors, Brown Ochre, Burn Umber:
Apply a coat of Mat Varnish to seal the surface from mudding with upperlayerd pigments.

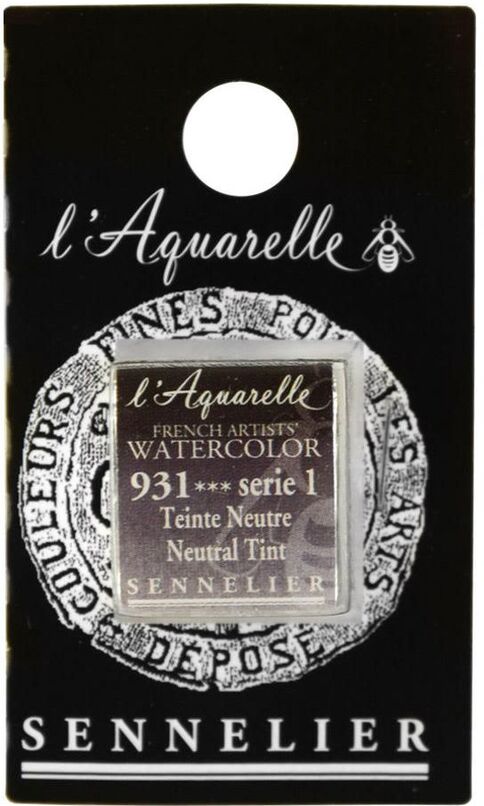
Sennelier + Ultramarine Blue Applied Thinly (scumbling or glazing) over the surface.
Step 6:
Apply Another Coat of Mat Varnish to Bringing the Lustre Back to the Surface:
Apply Another Coat of Mat Varnish to Bringing the Lustre Back to the Surface:

Step 7:
Now add the Spotlights (scumbling and scumbling till you are pleased); continue to adding subtle glazes for Color-Temperatures:
Now add the Spotlights (scumbling and scumbling till you are pleased); continue to adding subtle glazes for Color-Temperatures:
SENSE of DEPTH, Optical Gray (atmospheric perspective), which is achieved through the chemical mixture of opaque pigments (Black mixed with White opaque pigments) would not allow light to bounce off from the canvas.
It took me some trials and errors to discover a practical formula, however lacking in substance as the traditional French Method, “grisaille,” an optical mixing of Ultramarine Blue + Sennelier, would allow light to go through the surface of the canvas.
Sennelier Neutral + Ultramarine Blue For Depth
My optical gray, the illusion of ether, is achieved through the application of Ultramarine Blue over a brownish surface. (may neutralize into a gorgeous transparent gray).
Like Maxfield Parrish, I would glaze my background with Ultramarine Blue.
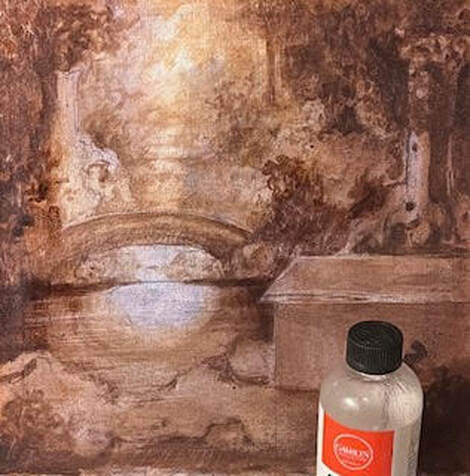
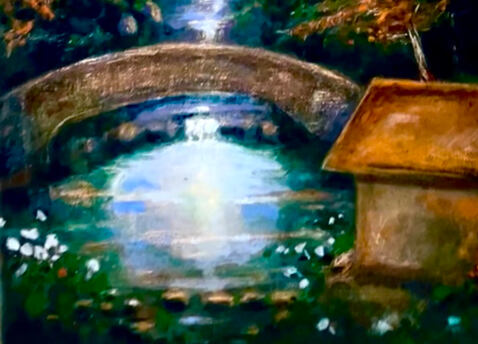
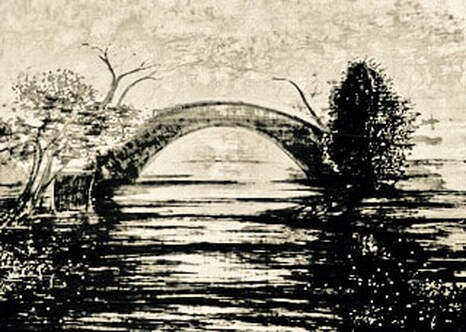
Painting: Bridge of Love, 36 X 48, Oil On Canvas by Eddie Beato:

1-* First Step
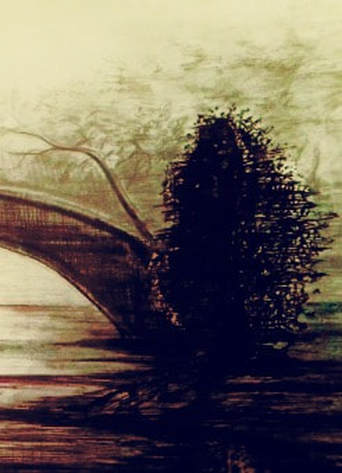
Charcoal Drawing:
Drawing should be traced on the canvas (tracing paper):
This drawing should be used as reference, otherwise our subjective mind could lead us astray. However useful, I don't use photos for some of my painting(s), because, after looking at a photic picture over and over again, it may impose itself on my idealized landscape.
2-* Second Step:
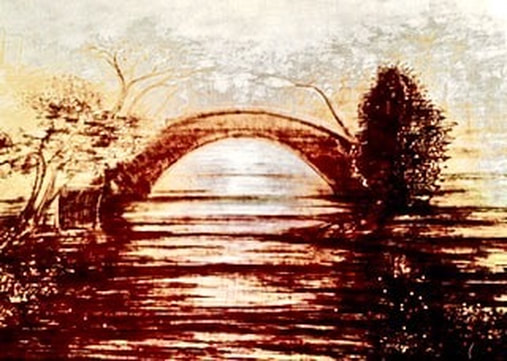
Imprimatura with a Warm Color:
Now, apply a thin coat of Brown Ochre, and work on the imprimatura. Wipe out, or define the highlight-areas with a piece of clothing.
The background (lovely buff-hues of brown ochre): the white of the canvas would be "slightly toned down," but it should be left "untouched" for luminosity.
3-*Third Step:
In-depth Aerial Perspective:
Weak colors, shades and nuances should partake of the "atmospheric light."
Please, paint twigs, splinters and tiny leaves with a small brush (slightly drenched with mineral spirt). Upon completion, apply a thin coat of transparent white (plus tints of Neutral Sennelier + Olive Green) over the background to "increase the illusion of depth."
The background (buff, or warm hues): I always allow the white canvas to should through (it is the first rule of the Pre-Raphaelites).
The white of the canvas should be left untouched for luminosity. At a latter point, you may block-in again with brown ochre, the main color in the scheme of things, to set the mood (temperatura) of the daytime
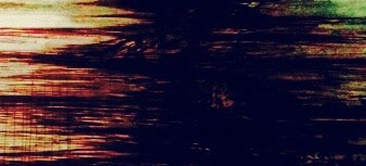
4-* Fourth Step:
Contrast and Juxtaposition of Warm and Cool Colors!
Are you pleased? Now start working on the darkest spots with burn umber + brown ochre.
Contrast and Juxtaposition of Warm and Cool Colors!
Are you pleased? Now start working on the darkest spots with burn umber + brown ochre.
5-* Fifth Step:
Mood of the Day: I am Glad!
Now, start controlling the mood and temperature of the day with a thin coat of Neutral Sennelier plus little hearty-beats of Olive Green-Tints for an in-depth sense of verdant pastures or "far-receding foliage". These dark-green colors would make your friend adore you forever!
You may continue retouching foliage, twigs, branches and woody splinters with pinceladas of Olive Green and Burn Umber.

Continue adding contrasts, but also more detailed foliage in the foreground, but don't overdo it. Be careful with very sharp contours, they may affect the "sense of expansiveness." Like a wise thinker, allow every form to partake of the peaceful atmosphere.
Mind you, the darkest spots should be found at the fore-ground:
Atch! The middle-ground is too dark, and this mistake is irreversible:
Mind you, the darkest spots should be found at the fore-ground:
Atch! The middle-ground is too dark, and this mistake is irreversible:
6-* Sixth Step:
Darkest Area - The Foreground!
Like a master, now start blocking-in with glazes of Neutral Sennelier for the illusion of depth in the foreground!!!
You any add tads of Emerald Green mixed with Olive Green in the foreground for saturation:
Darkest Area - The Foreground!
Like a master, now start blocking-in with glazes of Neutral Sennelier for the illusion of depth in the foreground!!!
You any add tads of Emerald Green mixed with Olive Green in the foreground for saturation:
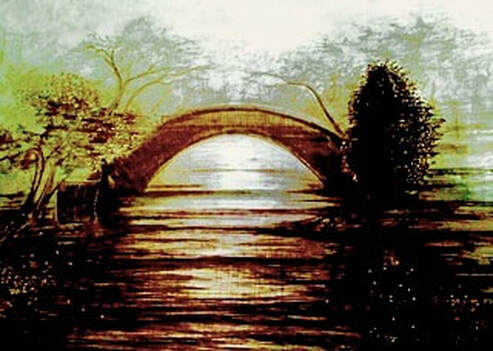
7th- FINE TUNING!!!
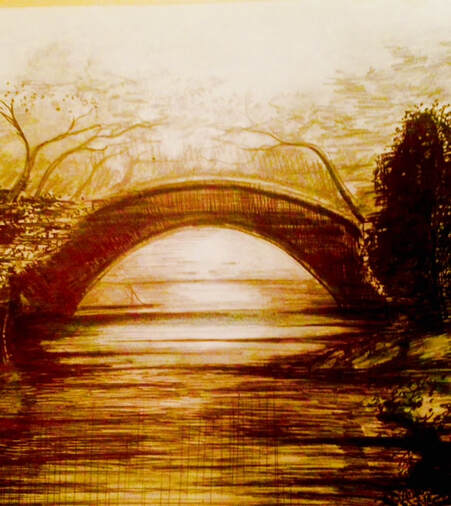
Lightest-Spot - Focus Point
Under the bridge!!!
Find the spot where you wish your light to shine brightest (behind the bridge of love).
Mind you, like a great poet, do not ruffle the idyllic scene with too many accidents, but rather, create a pleasant transitional graduation of dark-areas to lighter ones as befitting the toned-mood of your artistic sensibilities.
The Bridge of Love Oil On Canvas, 36 X 48 by Eddie Beato
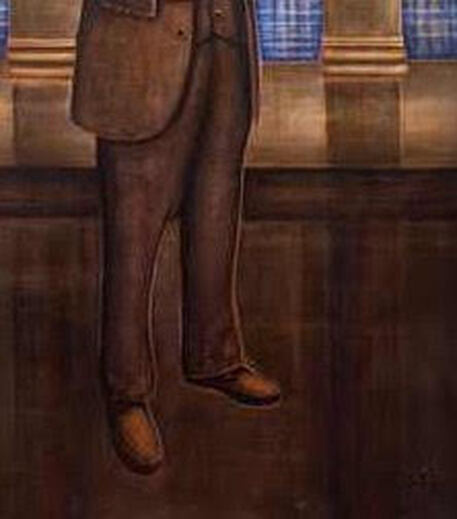
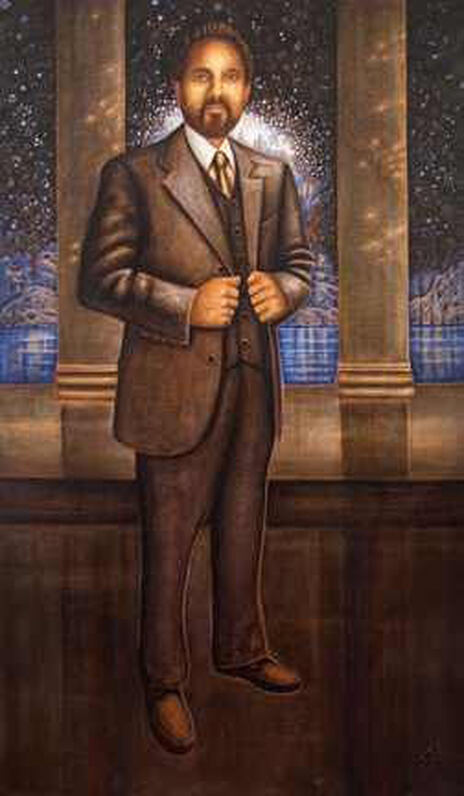
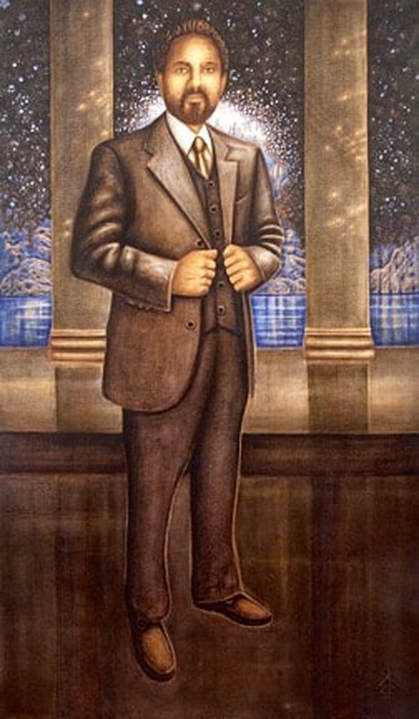
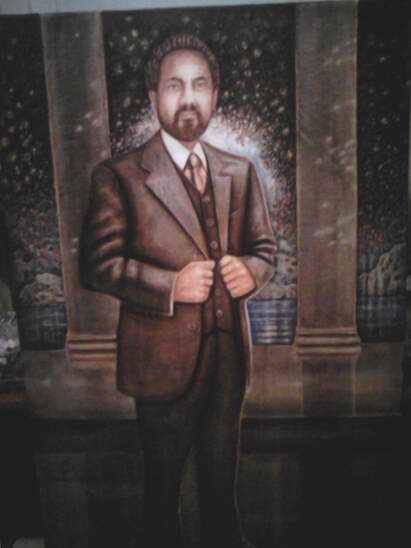
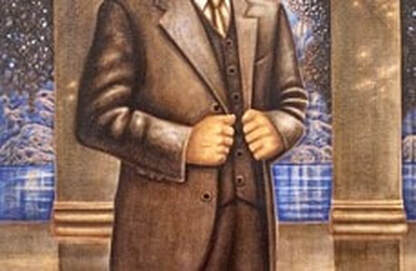
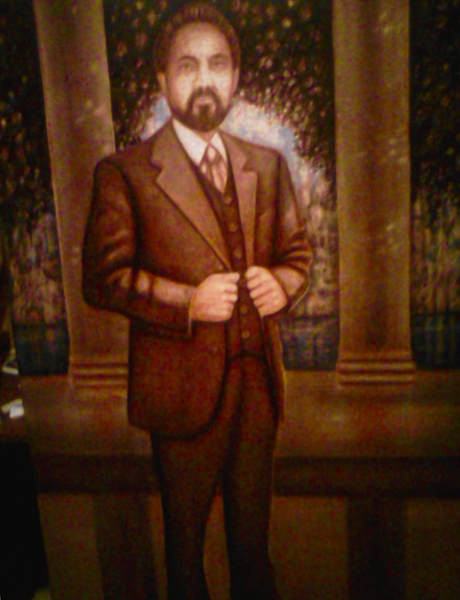
Painting Socrates Donned In Modern Attire:
1-* First Step:
I would trace the drawing on the canvas with tracing paper, and then seal it with acrylic white paint.
I would trace the drawing on the canvas with tracing paper, and then seal it with acrylic white paint.

2-* Second Step:
I blocked-in with Brown Ochre. Once dried, I would continue modeling and re-modeling with more Brown Ochre, Burn Umber (for stronger shadows) and neutral shades of Sennelier (neutral).
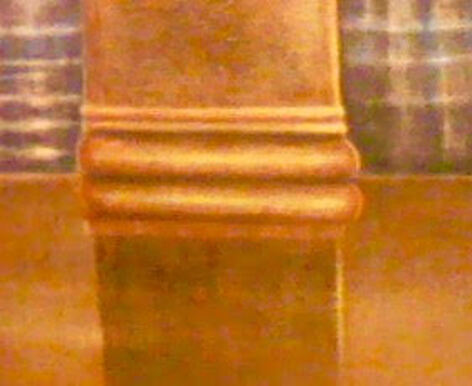
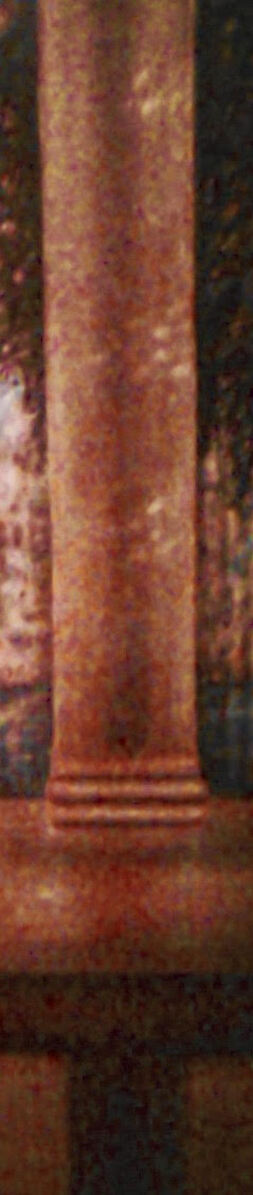
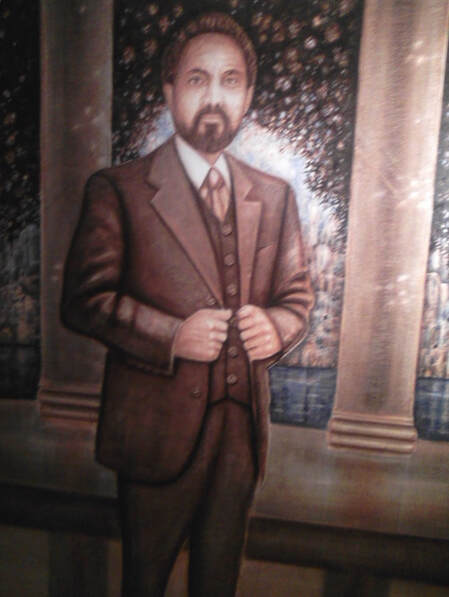
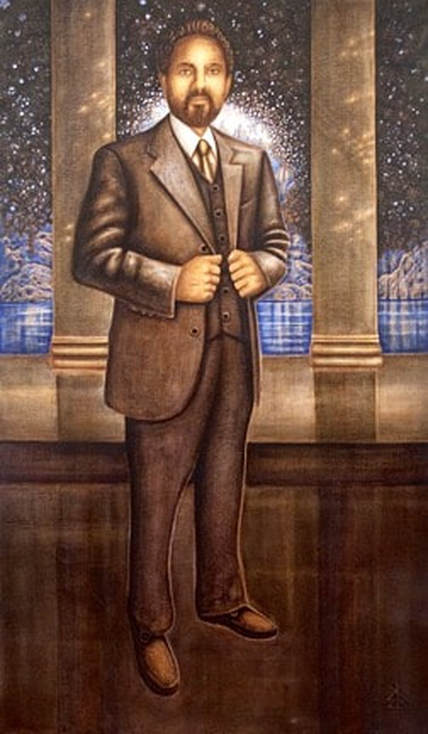
Having used Liquin medium and Turpenoid Mineral Spirit, I would let it dry for a few days, and then would start painting with Ultramarine Blue for the water in the background, and Ultramarine + Neutral Sennelier (for the marble columns) to creating neutral areas for light-spots.
Broad Washes With Brown Ochre
I blocked-in with Brown Ochre. Once dried, I would continue modeling and re-modeling with more Brown Ochre, Burn Umber (for stronger shadows) and neutral shades of Sennelier (neutral).
Having used Liquin medium and Turpenoid Mineral Spirit, I would let it dry for a few days, and then would start painting with Ultramarine Blue for the water in the background, and Ultramarine + Neutral Sennelier (for the marble columns) to creating neutral areas for light-spots.
Broad Washes With Brown Ochre

Once the drawing is fixed on the canvas, I would wash the painting with the same color (Brown Ochre) over and over, till the surface would shine very fiery and intense a glare. At a later point, I would reduce the Intensity with Neutral Sennelier + Ultramarine Blue. Notice how Socrates seems to appear natural within the surrounding atmosphere in my studio.
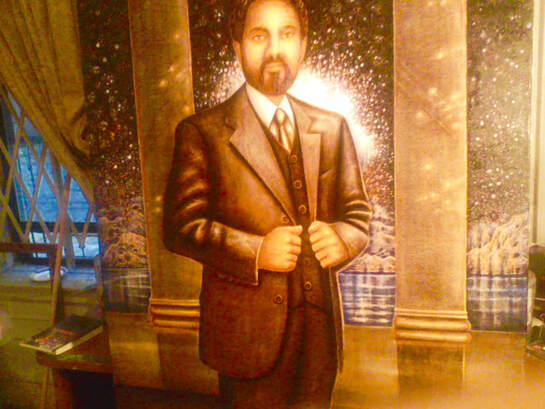
Reducing Intensity (color-temperature: minus or plus) with neutral senelier + ultramarine blue.
3-* Third Step:
Modeling & Neutralizing:
Neutral colors would welcome light with gladness. Therefore, here and there, contrive for neutral areas in your paintings!
Following the advice of Maxfield Parrish, I would seal every layer with a coat of varnish. This thin layer of varnish would prevent colors or pigments from becoming sullied or muddy due to chemical mixture. The mixture ought to be optical.
Coat of Mart Varnish Between Layers
I continued modeling with neutral shades of Sennelier + Ultramarine BLue till I was pleased!
4-* Fourth Step:
Shadow Accent and More Modeling:
I would add tad tints of Ultramarine Blue and Yellows and Oranges:
At this point, I would paint the Light-spots with Yellow Ochre + a Tad of Cadmium Yellow and Titanium White.
4-* Fourth Step:
Shadow Accent and More Modeling:
I would add tad tints of Ultramarine Blue and Yellows and Oranges:
At this point, I would paint the Light-spots with Yellow Ochre + a Tad of Cadmium Yellow and Titanium White.
5-* Fifth Step:
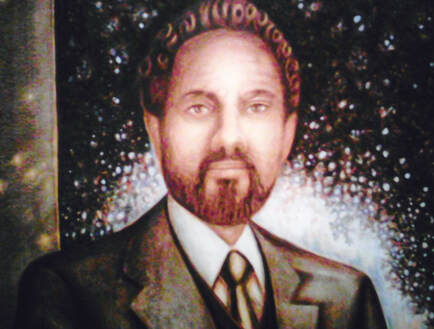
Adding Light and Working On The Face:'
beards, ringlets...eyes!
At this point you ought to zoom-in with a tiny brush for details.
Adding Light and Working On The Face:'
beards, ringlets...eyes!
At this point you ought to zoom-in with a tiny brush for details.
6-* 6th Step:
Reinforcing accents: zooming-in for tiny details (some artists would use augmented glasses for a super-realism). It is said of Salvador Dali, that at this point, the Master would use augmented glasses, but also very tiny brushes to painting objects so minute they are said to be beyond the human Ken of 20*20 sight-vision power.
Reinforcing accents: zooming-in for tiny details (some artists would use augmented glasses for a super-realism). It is said of Salvador Dali, that at this point, the Master would use augmented glasses, but also very tiny brushes to painting objects so minute they are said to be beyond the human Ken of 20*20 sight-vision power.
After a few days, weeks or even months of rest, with a clearer mind and free of toxics, I would cheerfully finish the painting with highlights, shadow-accents, and subtle glazes with transparent Sennelier.
The background's lovey stream was painted with thin glazes of ultramarine blue.
The background's lovey stream was painted with thin glazes of ultramarine blue.
7th*- Step - Fine Tuning!
Three months may seem like a lot of work for a single painting, but it was not so much about painting as it was much about cleaning and cleaning the living room and the brushes.
Liquin Medium for Fast Drying:
Three months may seem like a lot of work for a single painting, but it was not so much about painting as it was much about cleaning and cleaning the living room and the brushes.
Liquin Medium for Fast Drying:
For oil painting, I normally use a fast-drying medium called "Liquin" which I mix with Stand Oil. Stand Oil dries in two or three weeks, Liquin medium dries in two hours. With Liquin medium, Leonardo da Vinci could have painted La Mona Lisa in just a few months.
How do I paint marble convincingly?
Hmmm, it is a secret. I cannot reveal all my secrets, then you would paint better than me.
How do I paint marble convincingly?
Hmmm, it is a secret. I cannot reveal all my secrets, then you would paint better than me.
Get In Touch
|
We hope you have found Eddie's work to your liking. If you have any questions regarding bookings, his work or anything else. Please feel free to reach out.
|